Communicating with nature came into my life quite naturally. The trees were my friends as a child and have brought me solace as an adult. I thought I would share a short inspiration about how talking with the trees helps me in my spiritual and emotional life, supports my creativity and connects me to Amma even when I am far away from Her physically.
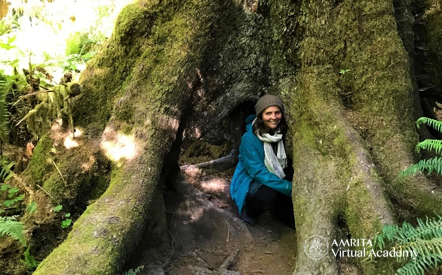
My hometown is London, and I’m lucky enough to live in a very green area (called Greenwich!) with a beautiful park that contains many large old trees. As a child I would play inside these trees (many of them are evergreens with branches that come almost to the ground, creating a separate world “inside” the tree. I would designate different areas to be the bedroom or the living room. I would make ‘cupboards’ in the roots of the trees, or up in the branches, and store my favorite rocks, feathers and petals safely.
After meeting Amma, as my spiritual life deepened, I discovered that being with these trees was much like being with Amma. If I was struggling being apart from Her form, I would visit these trees and hug them. Lie on their branches. Lean against their trunks.
“Being in the space of the trees and flowers connected me to a wisdom that was larger than myself.”
We started to build a relationship, and I would feel them reaching out to embrace me long before I was leaning in to hug the physical trunk of the tree. Every day I would look forward to the moment when I could walk in the park and visit each of my tree friends in turn.
One day I was struggling with something and I spontaneously found myself talking to the tree about it. I felt safe with this gentle giant, and could open my heart fearlessly, knowing I wouldn’t be judged or evaluated against some imaginary standards. To my surprise, the tree ‘spoke back’. Or perhaps more accurately, I discovered that inspiration and insight were easily available in the shelter of the tree’s embrace.
I started to explore this phenomenon. I bought myself a dictaphone (so that I wouldn’t look like a crazy lady!!) and I started recording the information and inspiration that would come. I discovered that if I was willing to be open, and talk freely about whatever situation I was facing, if I was open to the ‘muse’, being in the space of the trees and flowers connected me to a wisdom that was larger than myself.
“It really felt to me like Amma was answering my questions through these incredible tree beings.”
If I needed direction for my work, I would ask the trees what to focus on. If I was sad, I would share my feelings and allow clarity to wipe my tears. The trees became my daily companions. I would seek out their counsel and each day I would be surprised by the depth of insight that flowed back in response to my explorations. It really felt to me like Amma was answering my questions through these incredible tree beings. After participating in these conversations, I would feel such a sense of peace and steadiness, like I was exactly where I needed to be and was right on track.
Since that time, I have continued this practice in various places around the world, wherever my travels carry me. It’s always beautiful to commune with nature, and bring my questions to Her gentle embrace. And yet, the depth of response is not the same without the relationship. Nature is more like a silent witness, holding space for my process, but the responses are generally not as profound as with my deep-rooted tree friendships in that park in London! Perhaps this mirrors our relationship with Amma, because when we feel close to Her in our hearts, we are much more open to following Her guidance in our lives. I pray that one day I can have that depth of friendship with the whole of nature, and see Amma in everyone and everything!
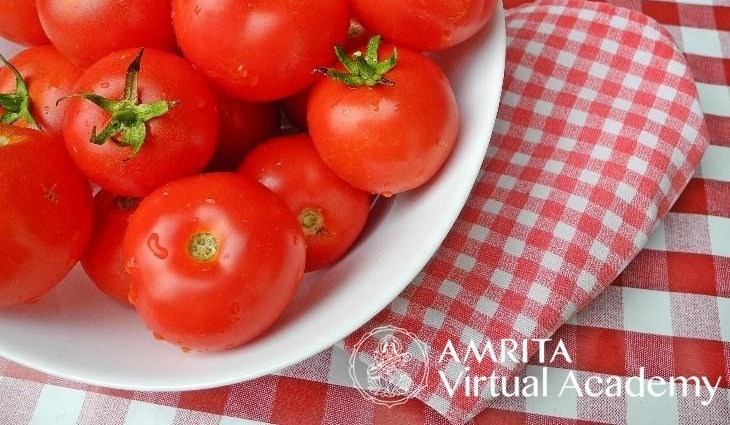
When planting tomatoes one of the first considerations is how far apart should I put my plants. Spacing will be determined by the plant variety you choose. The smaller ones can be planted closer together. Those that get pretty big need room to grow. If you are staking the plants, then you can bring them closer together. General guidelines are about eighteen inches to two feet apart in the rows and about three to five feet apart between rows. It really depends on the variety. If using raised beds that are not walked on, then you can reduce the spacing.
Seedlings, Hardening-off
Seedlings are really essential in almost all parts of the US, as the growing season is not long enough for the plants to fully develop. Seedlings should be started 6 to 8 weeks before you can place them outside. The temperature outside needs to be warm enough, as I stated earlier. When using seedlings it’s important to harden them off by gradually placing them outside and reducing their watering and fertilization and not allowing them to get exposed to cold temperatures in the evening. Covering or sheltering them in the night is very important, as you don’t want seedlings to be exposed to temperatures lower than 60°F. This way, they slowly adapt to the winds and hot sun of the outdoors. Once they have gone through about four or five days of this adaptation, then go ahead and plant them.
If the soil is not warm enough, then place black plastic on the bed to warm it up during the time you are hardening off the tomatoes.
Transplants have been grown in 70° weather. Therefore, putting them in temperatures that are much colder than this is not a good idea, as they tend to develop catfacing (indentations and scars around the blossom end of the fruit versus the stem end. These scars can develop deep inside the fruit. It allows for disease and animals to move in and makes the fruit look really ugly.) Therefore, keep the plants above the temperature in which they are normally grown or very close to it, especially at night, by providing protection until the temperatures outside get into the 70°s F.
Transplanting and Liming Tomatoes
Tomato plants are one of the only plants where you should plant deeper than the soil (3) line in which the seedlings are grown. The transplant should be less than a foot tall. You can dig a trench about four to six inches deep and carefully bend the stem of the plant so the root is at an angle and the actual stem is partially planted, allowing only two or three sets of its true leaves above the soil. The stem will develop roots and establish itself and make the plant stronger.
Before you plant, add about a ¼ cup of lime to the soil where the tomato plants will go. Incorporating this additional lime will help prevent blossom end rot. Use powdered lime, as lime takes time to dissolve and incorporate into the soil. The powdered version will dissolve quicker than the pelletized version. Do this for each plant hole or area right before planting.
Water well once you have finished planting and immediately place the cage or stake into the ground. The stake should be around six foot tall, and placed no more than a foot away from the plant. Do a small application of organic fertilizer or compost tea. Do not over fertilize.
Watering
Regular watering is a must with tomatoes. A good inch or two per week is acceptable, depending on the type of soil. If it’s sandy, then two inches of water is good, during the hot summer days and if it’s a more clay type, then one inch will suffice. The main thing is to keep it evenly moist and not to allow it to dry out. Mulching with straw, partial compost, or shredded leaves is really key, as this will prevent the roots from drying out. Tomato roots are near the surface and can easily be impacted by drought, after which they would immediately begin to develop blossom end rot.
During the hot summer months, it is best to water deeply twice a week or between one to two inches per week in two separate intervals.
Why Do Huge Plants Bear No Fruit or Very little?
The main reason for this is over fertilization. Once the plants are planted in good organic soil and lightly fertilized, it is best to not fertilize again until the plant starts flowering. The reason is that, in the beginning, the plant is in the growth phase. If you fertilize early on, then it stays in this phase. You will get a huge plant but no fruit. Therefore, wait until you see flowering and then give it a side dressing. This makes sure that the plant has moved into a reproductive stage.
Disease and Insects
Blossoom End Rot
This is damage to tomatoes in the blossom end of the fruit. The fruit forms a tan or flat black spot, and then secondary bacteria or fungi enter and cause further damage. Usually, this occurs in hot dry spells.
The cause is a lack of calcium as the fruit develops. This doesn’t mean there is no calcium in the soil but rather it is not available to the plant. Some causes of this are uneven watering; as a result of water fluctuation, the calcium becomes less available to the plants. Excessive fertilization causes the plant to go into a fast growth spur, especially if using non-organic fertilizers that are heavy on salts. Weeding done too close to the plants can damage too many surface roots, and this will stress the plant and not allow it to take up as much water.
The best solution is keeping the moisture even, mulching, avoiding weeding with a hoe or tool at least a foot from the plant, but rather hand weeding.
Growth cracks – the fruit grows very quickly and literary cracks open.
This occurs if you get heavy rains and hot temperatures or if, after having gone through a drought period, all of a sudden you get a lot of water and the growth occurs very rapidly. The cracks are not a problem, as the fruit forms a film and quickly heals itself. The problem is that sometimes bacteria and fungi attack the fruit and cause it to rot.
Click here to learn more about our gardening courses inspired by Amma!
It is best to keep the plant evenly watered, to use mulch, and to use varieties that are less susceptible to cracking. Some good hybrids have been produced.
When using mulch, use straw or any of the others mentioned earlier. If using dried grass clippings, make sure they are not treated in any way with any type of chemicals. Tomatoes are very susceptible to chemicals used on lawns. If plants are exposed, they will grow distorted, or they can twist or just get stunted.
Fusarium wilt, Verticillium wilt, Early blight and Tobacco mosaic virus.
These diseases cause the plant to suddenly wilt and die quickly. They may look different but the result is early death. I feel that, if you grow resistant varieties, it’s the best thing. But if you do grow some heirlooms, there are some varieties that are more susceptible than others, and this is the chance you take.
Keeping the garden free of debris by, cleaning up old plants from the prior year, using a three-year crop rotation, not smoking in the garden and washing your hands after smoking before touching the plants, and disposing of any plants that get infected – versus composting them. The disease resistant varieties are labelled when grown and for the seeds sold.
Pruning of Tomatoes
Intermediate and indeterminate tomatoes are the ones that need pruning due to the vast amount of suckers they send out. The suckers can be from the base of the plant or in between the main stem and the leaves. These suckers develop into full-fledged plants that bloom and produce tomatoes. So why prune them at all?
Many studies have been made to determine the value of pruning. The results are very consistent in showing that pruning will increase your yield, as the tomato plants tend to send so many suckers. These suckers take up a lot of the plant energy by producing lots of leaves and a whole new plant. Therefore, less energy is going into fruit production; instead, it’s all going into making leaves. So, if all the energy is going to produce leaves, there will be less fruit. So many leaves increase the potential for disease due to decrease in circulation and aeration.
But the pruning has to be done right versus just any old way. Otherwise, the yields will be less. Many people think it’s the top that gets pruned, and the tips. This is not the case at all. When you see suckers coming up from the roots or the base of the soil, prune these away. There is one sucker that does not get pruned. You must look for the first flowers to appear.
Once this flower appears, there will be one sucker right below it, no exceptions. This particular sucker does not get pruned. All other suckers between the main stem and the leaf get removed at the junction, except that one right below the first flower.
Why don’t we prune away the one sucker right below the first flower? There have been several studies that found the additional growth hormones that come into play as the plant goes from a growing stage to a fruiting stage are found in great numbers right by the first flower. As a result, they positively influence this sucker, resulting in a very large productive plant that produces lots of fruits. The yield is just as high as the main plant. Proportionally, the fruit ratio is higher than the leaf ratio. Unlike the rest of the suckers, which produce a lot of leaves and less fruit by comparison.
If you observe closely, you will notice that the suckers below this particular first flower – sucker you are leaving behind will be larger than those below it. Despite the fact the other suckers lower in the plant are older and came out maybe a week or two before.
You will then remove all the other suckers growing between the stem and the leaves. You will also remove any suckers from the one sucker that you have allowed to develop, as all suckers behave in the same way as a regular plant. The end result is a two-plant system developing with one root stock. When you stake the main plant, also have a second stake for the extra plant you will allow to develop.
Happy growing!
All photos are copyright protected. Photos 1-4 by Patricia. Photos 5-8 by Marleny.
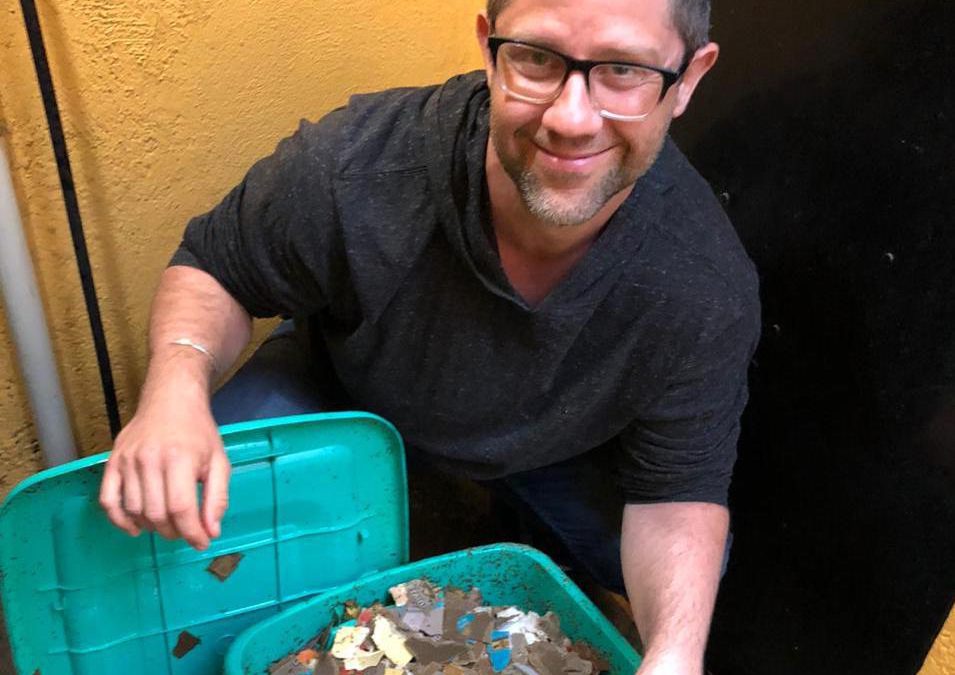
Ever wondered what happens to your recycling once it leaves the curb? Neither did I until March of 2017 when my waste management facility informed me I could no longer recycle most plastics because China wasn’t taking them anymore. It was a huge wake-up call. I hadn’t been aware my recycling was being sent to China, mainly because I never inquired. As long as it magically went away each week, I felt satisfied I had done my part. Now I know, there is no “away.”
Here’s how it (basically) works: In the US, every city or county has a Waste Management Facility with whom they contract with. These are your ‘haulers’ – the ones who come to the curb, pick up your waste and bring it back to their facility. The garbage is sent to the landfill or incinerator and the recycling is dumped into a big-rig container. Once that container is full, it is driven to the Materials Recovery Facility or ‘MRF’. Pronounced like ‘Smurf’, but with an ‘M’. At the MRF, the recyclables are sorted and the plastics that have a viable market are crushed, baled and most likely shipped overseas. What about the plastics that aren’t viable? No one really knows for sure what is happening to those. I tried calling MRF’s in several cities to ask what their end-markets were. None of them would answer my questions, saying the information was “proprietary.” All I wanted was the truth, but the truth isn’t always convenient.
“Our every action matters to something or someone, somewhere.”
The truth is, only 9% of all plastics ever created have been recycled. Since 1950, we have created 9.2 billion tons of plastic. Of that, more than 6.9 billion tons have become waste. And of that waste, a staggering 6.3 billion tons never made it to a recycling bin, so now we are drowning in it. The great thing about plastic is it’s so durable. The problem is, it’s so durable it doesn’t decompose. It only breaks down into smaller and smaller pieces which we call microplastics. These microplastics can now be found on every beach, in every bucket of water scooped from any ocean, in our sea salt, fish, marine animals, atmosphere, water supply, and in us. It has never been more critical that we heed Amma’s warnings to reduce our consumption of single-use plastics and care for and protect Mother Nature.
What we know today, is there is a still a viable end-market for plastic resins #1 and #2 PET and HDPE – mainly bottles and jugs. They are higher quality and can be more easily recycled or downcycled in actuality. This makes them more profitable and therefore, more desirable. The other types of plastics (#3 – #7) are not easy to recycle or cannot be recycled because they are made from low-quality polymers or have already been downcycled several times. Not to mention most facilities in the United States are not equipped to process them. Additionally, the current low cost of oil per barrel makes it cheaper for manufacturers to use new, virgin plastic than to sort, clean, melt and recycle lower-quality, contaminated plastics. So, what happens to these undesirable plastics?
Well, depending on where you live, the majority are either being landfilled or shipped to end-markets in third-world countries such as Philippines, Cambodia, Ecuador, Vietnam, Turkey, Ghana, Thailand, Bangladesh, Senegal, etc. Right now, alarm bells should be going off. Yes – we are sending our garbage plastics to other countries that can’t even process their own. These developing nations’ are shouldering the burden of developed nations’ over-consumption. So, what are they doing with all of this plastic waste? Good question.
Some of the more viable plastics are melted down and made into “nurdles.” Nurdles are tiny plastic pellets, the size of a lentil or smaller, that serve as the raw material for most plastic products. Due to mishandling and industrial spillage, these pellets are a major source of plastic pollution in their own right. The less viable plastics are piled up in open dump sites, incinerated or processed in recycling facilities, many of which are operating illegally without any regard for the environment or the safety, health and well-being of the people working there.
One of the most important things to realize is when we collect and remanufacture plastic, we are only delaying its disposal as it can only be downcycled so many times. The final destination for all plastic is either a landfill, where it doesn’t decompose, or an incinerator, where it releases harmful chemicals when burned, or the environment in some form of pollution.
So, is there any good news? Well…Yes! YOU are! You CAN make a difference! At the end of Amma’s 2019 New Year’s Message, one of the questions she posed to each of us was, “Am I able to contribute and play my part in protecting the environment?” We can all contribute and play our part if we:
· REFUSE – what we don’t need. Manufacturers’ will stop making when we stop buying. · REDUCE – single-use and unsustainable items. · REUSE or REPURPOSE – what we already have. · REPAIR – rather than throw away, there is no away. · RECYCLE – what we can. · RALLY – your elected officials to pass legislation on single-use plastics.
And remember, no action toward the care, protection and conservation of nature is ever too small or insignificant. Our every action matters to something or someone, somewhere.
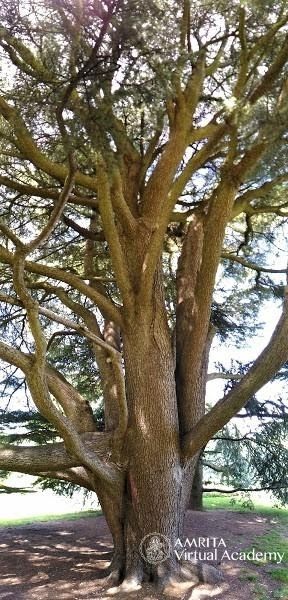
As part of our blog series on communicating with Nature, I thought I would share with you an extraordinary experience I had talking with a tree a few years ago. I have always had a strong relationship with trees, as a young girl I would spend hours in the tree in our back garden, and created entire imaginary houses inside the big trees in our local parks. Trees were my refuge in many ways.
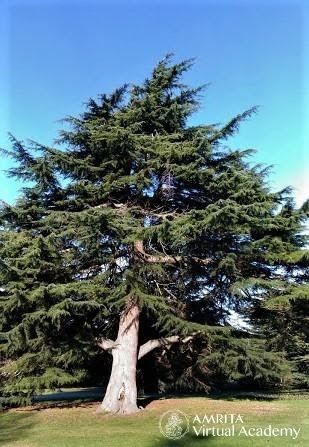
A couple of years ago I was in Northern California, living next to a huge Madrone Tree. Out of the blue one day we sparked up a conversation – it’s not unusual for me to talk to trees, I’m sure you’ll hear more about that in future blog posts! This tree was so engaging and willing to communicate that I just continued asking questions as long as this beautiful tree was willing to answer.
At first, I asked the tree, do you communicate with other trees and plants the way that I’m communicating with you. It showed me that there were ‘guilds’ of plants, and that the communication happened between plants that belong to the same guild. Which guild you belonged to had a lot to do with size and function. I was shown a strong community essence between the plants in each guild, and a kind of network that connected them, helping each individual plant feel like it was a part of something bigger.
“There was a sense of togetherness and community that was deeply nurturing.”
This particular tree that I was talking to was in a forested area, with some human habitation but lots of nature. I started to suggest that it must be very comforting for these plants when they lived in close communion with each other, such as in the forest and it agreed. There was a sense of togetherness and community that was deeply nurturing. Inquisitively, I asked about the trees that were alone – like when a farmer just leaves one or two trees in the middle of a large field, and my Madrone friend showed me that they all feel really sad for that tree and send it as much communion as they can – through a kind of underground web. Unfortunately, I got the sense that it is not the same and those trees that are alone do have a much more isolated and uncomfortable experience than the trees in the forest.
I was fascinated by this, because it gave me the sense that trees have ‘feelings’ and I got really curious. Do trees also have senses? Do they also feel in the way that we feel?
I proceeded to ask this beautiful Madrone tree a series of questions, and the answers were quite amazing. I asked about the sense of touch, and immediately the tree zoomed in to show me that it is aware of even a tiny ant crawling on it’s surface. That is how sensitive it’s touch-receptors are!
I asked about listening/sound and it showed me that every single tiny sound vibration passes through the tree and each leaf and branch ‘feels’ it – it’s not quite like having human ears, but I could experience the way the tree ‘heard’ for a moment and it was very beautiful. It actually showed me that the way that we use sound around plants can have an effect on them, that intense noises are very jarring, even for the big trees. I got to see that trees and plants feel appreciative of those who are conscious of how they use/express sound when in nature!
When it came to the eyes and sight, I suppose I assumed that the tree would have to say ‘no, we don’t see’ but in reality it showed me how each leaf registers every nuance of light and dark, how the whole system responds very much like the pupils of our eyes respond to darkness as well as to bright light.
“This tree was blowing my preconceptions right out of the water.”
This tree was blowing my preconceptions right out of the water. This being was so closely aligned to my experience, even though our forms expressed life in such profoundly different ways. When it came to the sense of taste, I couldn’t imagine how the tree would respond. It seemed willing to keep communicating, so I kept exploring! Taste was fascinating, because even though very different from our taste which happens only with the tongue, there was awareness of the different qualities of what was being absorbed through the roots. And at the same time, the leaves had sensitivity to the water and other substances that would fall on them.
The tree was able to perceive when the air around was smoky, foggy etc through the interaction between the leaves and the air. This related to our sense of smell, even though the receptors in the tree were different than the way we receive smell through our noses. I had no idea that the trees were sentient in such a similar way to our human sensing, that they are registering sensory input, communicating and expressing connection in a way that has a lot of similarities to us humans!
Writing this post in the middle of lockdown, when luxuriating in nature is a distant memory, is such a great reminder to me of the power of communicating with my plant friends, and how much closer it brings me to the whole of life. Our modern world believes concepts that allow us to impose on nature, and imagine it to be less sentient than we are and therefore less valuable. If this post inspires you, consider this an invitation to go on your own exploration of talking to nature and learning the lessons she has to teach you, it is always such a gift every time I’m willing to stop and listen!
Check out this TED Talk below where Canadian researcher Suzanne Simard has scientifically proven that trees do in fact communicate and support one another cooperatively.
This post is the second of a two-part compilation on composting with red wriggler worms.
Making a Worm Bin is much easier than it may seem at first. It is a fun and easy process anyone can do. Below is a step by step process for making a worm bin. To make a Worm Bin, you will need the following items:
Plastic storage bin (medium or large) Drill or screwdriver (be careful!) Organic gardening soil Organic compost Recycled cardboard Vegetable and fruit scraps Water
Prepping Your Worm Bin
Using a drill or a heated screwdriver (be very careful in any case and keep children away at this point!!!), puncture 3-4 holes 1 or 2 inches below the top of the plastic bin. This allows for fresh oxygenated air to enter so your worms can breathe!
Turn the storage bin upside down and puncture 6 to 8 (or more) holes in the bottom. If conditions within the bin become uninhabitable for the worms, they can escape to freedom. The adventurous worms often burrow out, so check under the bin weekly to see if they are trapped underneath.
If you are putting only the Suggested Food Scraps in the bin (see below) and the bin does not feel hot or steamy, then you can simply put the worms on top of your compost layers again. They will go back to munching away on their gourmet feast!
Prepping Your Suggested Food Scraps
Globally, 1.4 billion tons of food is thrown into landfills yearly. The food is usually in a sealed plastic bag – which makes it all the worse! That food is not going anywhere for an exceptionally long time and the plastic remains on the Earth for millions of years!
To help mitigate this effect, conscious people can compost. Since I began worm composting almost 2 years ago (with only 1 bin at that time), we have reduced trash bags going to the landfill by 75% or more! It has given my household a greater awareness of food waste, too!
When our worms could not keep up with our weekly food waste, we began to become aware our serious food waste problem that we had not even noticed existed – which sadly was initially very high due to buying more at the store to reduce grocery trips. We began a much more careful “food in” and “food out” inventory; and, we are happy to announce we have almost no food waste now and have saved a lot of money in the process.
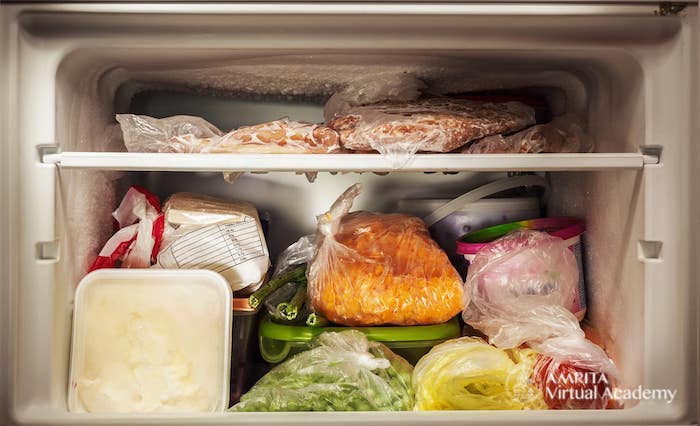
But do not be alarmed! If you have too much food scraps and no room in your bin, freeze them. This is better for the worms in the long run.
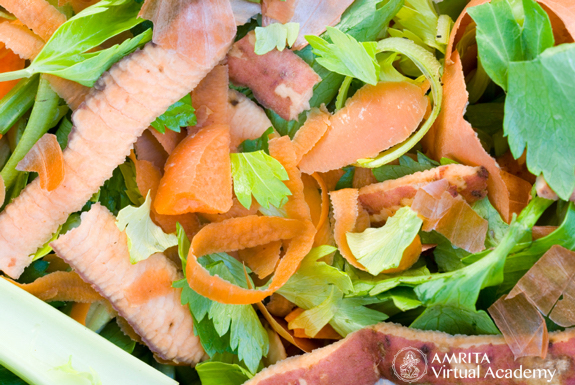
All vegetable and fruit scraps can go in the worm compost bin: EXCEPT: garlic, onions, hot peppers (chilis or jalapenos, for example), and citrus fruits. In addition, do not put cooking oils, cooked foods, dairy, or meats in the worm compost bin. Tea leaves are great. SOME coffee grounds are okay OCCASIONALLY.
When you cut up fresh food scraps (“very small, please!” request your worms) it can take a week or so before the scraps decompose and liquefy enough to be eaten by our worm kids. When you take frozen scraps out of the fridge and chop it up it often turns into a liquid mush. This is exactly what the worms crave!
Try to separate veggie greens and other acceptable veggies and fruits separate inside or outside of the freezer. The idea is to keep the greens separate from all other veggies and fruits. This separation should occur whether the food scraps are kept in a freezer or not
Prepping Your Recycled Cardboard
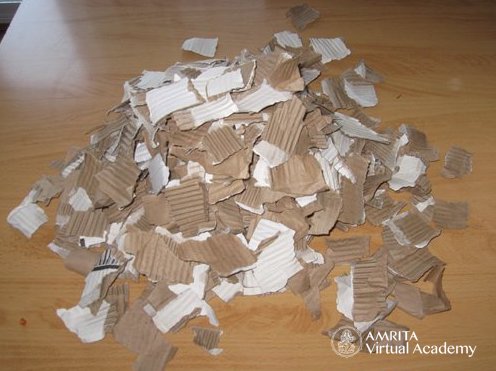
Save your cereal boxes, Amazon boxes, and any paper or cardboard packaging. “Reduce, reuse, and recycle” is the motto. Now we will reuse that cardboard! Shred or tear up the cardboard and save it in a dry place. Cardboard is both the bedding and a huge food source for the worms.
When you are ready to make the composting layers in your bin (see below), place several handfuls of cardboard in a bucket that has been cleaned free of any cleaning product or chemical.
Add water. Mix the water and cardboard together. Squeeze out the excess water from the cardboard pieces before applying to the worm compost bin. The consistency should be like a damp sponge after the water is squeezed out of it.
If you do not seem to be harvesting enough cardboard and paper packaging, start saving the napkins you use to wipe your mouth and paper towels (that do not have chemicals on them). The worms love it!
Creating A Home for Your Worms & “Compost Layering” in the Worm Bin
First, add 2 inches of organic soil to the bottom of your worm compost bin (after drilling or puncturing the holes as described above). Then, add 2 inches of organic compost. Thereafter you will make layers of food scraps alternating with damp cardboard and paper products. It is suggested to keep GREENS separate from all other food scraps. Greens ideally go on top to keep the bin from heating up. A layer of wet or dry paper products on top is said to reduce fruit flies, etc.
Worm compost bins are easy to keep up with. I add damp cardboard and food scraps once every week or every other week. You will be able to “eyeball” how much of each is needed very quickly. In hotter climates or hot times of year, more damp cardboard may have to be added liberally.
Black Gold (worm castings)
The red wriggler worms will tend to stay in the upper layers of the worm bin and what moves downward? Black gold! Black gold is worm poo; or worm excrement. Black gold is a mixture of soil, broken down food particles, broken down cardboard, and worm excrement. This makes a superb natural organic fertilizer for indoors and out door plants and vegetables – it is full of nitrogen and phosphorus and life!
Thanks for reading! If you find this information useful, or would like to share your insights about composting, send an email to: amritaculture@amritavirtualacademy.com
I will be offering a series of urban gardening articles for the Amrita Virtual Academy blog. In this first edition on Urban Gardening & Composting, I offer to you one of several effective ways of composting when you live in an urban environment.
This post is the first of a two-part compilation on composting with red wriggler worms.
I live in the middle of the capital of Estado de Mexico, called Toluca. It is a bustling and vibrant city right outside of Mexico City.
Our local chapter, GreenFriends Mexico, focuses on urban gardening, urban composting, and the vital need for Source Reduction. (Source Reduction means to consciously reduce the output of waste we create. Even recyclable materials need to be reduced – or re-used – if possible.)
What is an urban environment? How do we define such a thing?
Literally, it is living in the city in a home or possibly an apartment. There may be a little patch of grass outside, a small yard, a mini-balcony, or a small patio. These are great environments to start a nice Red Wriggler Worm Compost Bin!
Why Red Wriggler Worm Composting?
One question that comes up about vermiculture (worm composting) is: “Can this be done in the city?” The answer is yes! In some urban homes it is easier than others. However, we can get creative in homes that have less or no green space.
Even in more rural areas – such as newer modern housing complexes or gated communities – they have small porches and little or no green space or yards. This is a common trend in many areas.
In our modern “cement jungles,” it is especially fun for children and “kids at heart” to play with these amazing little worm souls! Kids love to participate, learn, and play with the worms!
It helps both children and adults that live in cities and other urban areas to connect with Mother Nature, understanding composting (and how long it takes for even food waste to “go away”), and to experience the wonders of Life right at home in the palms of your hands!
There are three initial questions you will want to answer before starting a worm compost bin: Where will my worm compost bin be placed?
How large of a worm bin is manageable in the space I have?
If I live in a cold climate, do I have a place to bring the worms inside, so they do not freeze to death?
Q1: Where will my worm compost bin be placed?
A: In an urban environment, there are many places you can explore placing a worm bin. In a garage, on a balcony, porch, patio, or if you are lucky enough to have a private green space that would be great.
Q2: How large of a worm bin is manageable in the space I have?
A: Urban homes come in many different shapes and sizes depending on which city and part of a city you live in. If you have more space like a garage, patio, balcony, or strip of green land outside, a worm composting bin is perfect in these spots.
I have two bins in my tiny garden outside!
I have used medium sized to large plastic storage bins to house my red wriggler worms.
The bin cannot be too small! They need space to play, live, move, and eat. If the bin is too small or uncomfortable, they may seek new living arrangements soon!
For small apartments and homes with limited space, the worm bin may not be the best option. We will share more blogs on urban composting to come in future months, too!
Q2: If I live in a cold climate, do I have a place to bring the worms inside, so they do not freeze to death?
A: This is probably the largest consideration for using worm bins in an urban area. What are your autumns and winters like? During cold seasons, the worm bins must be brought indoors – in a garage for example. If you are shivering outside, it is too cold for your worms, too! In temperate and warmer climates (like mine), the bin can stay out year-round.
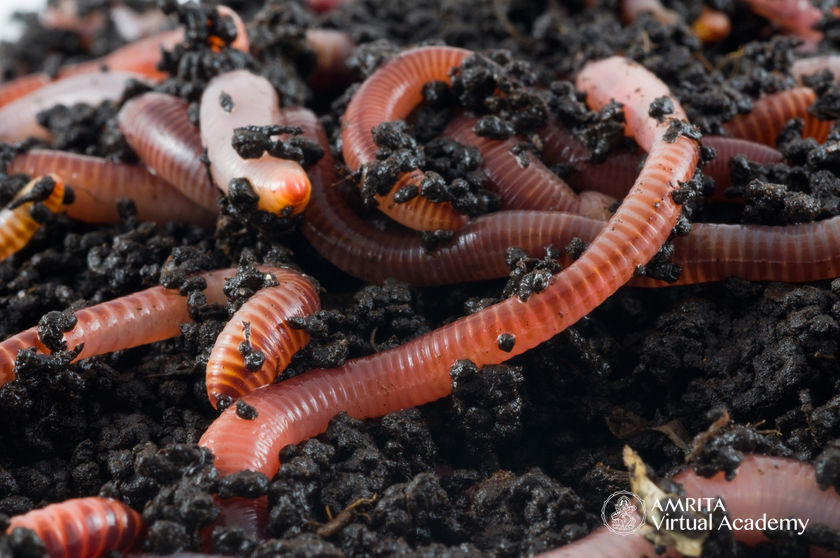
You can only use red wriggler worms in the compost bins for your vermiculture experiment. Other species like the common earth worm will die in the compost bins because they do not like enclosure like the red wrigglers do.
Red wriggler worms are hermaphroditic! Expect babies over time! The red wrigglers tend to gather in clusters in the bin to eat and hang out. When their bodies rub together, larvae are produced which look like little brown or whitish-brown beads. You will definitely notice the babies as they are tiny, and the adult worms are long, plump, and large!
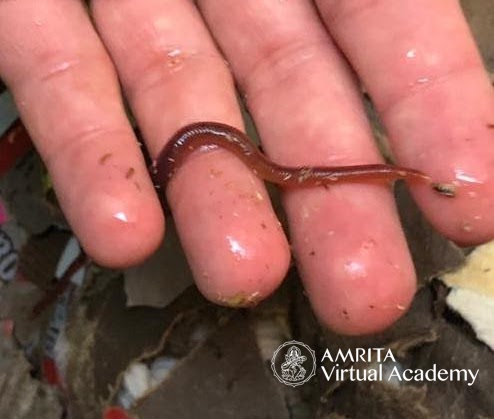
Red wriggler worms eat their body weight worth of food a day!
If ever you want the worms to descend deeper in the bin, shine a flashlight on them or talk loudly. They do not prefer the sunlight or loud voices to interrupt their seva (selfless service) or eating meditations!
You can buy your red wriggler worms online with a simple Google Search.
This makes a superb natural organic fertilizer for indoors and outdoor plants and vegetables – it is full of nitrogen and phosphorus and life!